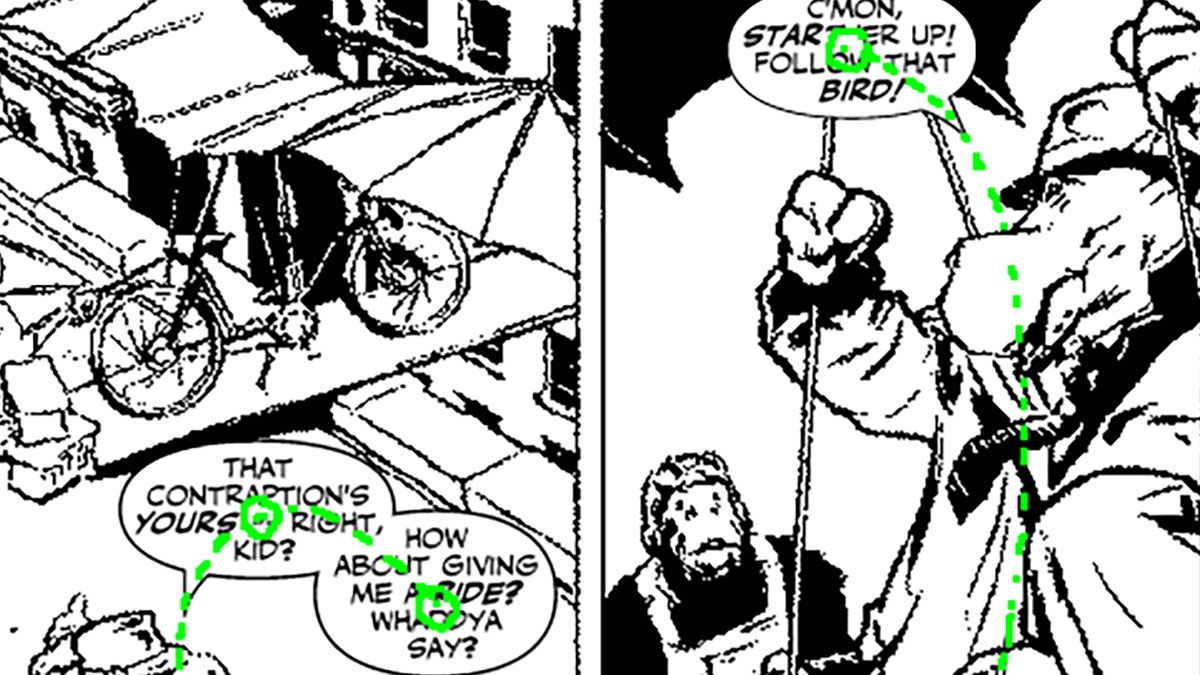
How to create tails to point at characters or connect two balloons.
Bill writes:
“I have some problems making my pointers curve the way I want them to. Also, when you have two bubbles a little way apart, how do you connect them? I want the line to curve but they look wrong.”
Getting tails and joins to look right takes practice more than anything. As you gain command of Illustrator’s pen tool and bezier curve handles, combined with an understanding of what makes for a well-drawn tail, it will start to become second nature. Here’s a couple of pointers (pun intended!) to get you started…
Drawing Tails:
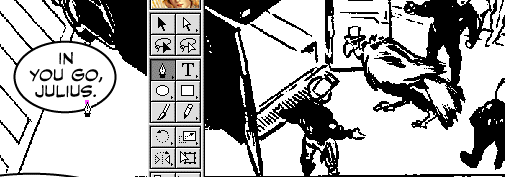
1. First type the text and draw a balloon around it (click here for pointers on this process). Then select the pen tool and click inside the balloon.
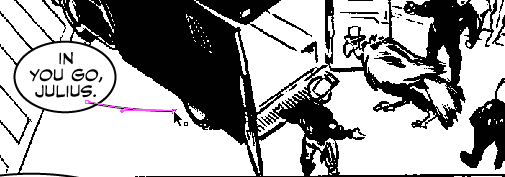
2. At about 1/3 to 1/2 the distance to the character’s mouth, click and drag to give the edge a slight outward curve. Then hold down the Option key and click on the point you just drew. This removes the outside curve handle.
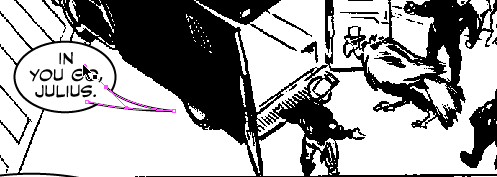
3. Back inside the balloon, click and drag to give this edge an inward curve.
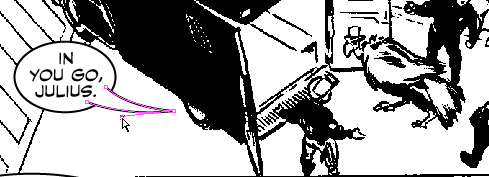
4. Now go back with the open-arrow tool, click on each point, and adjust the curve handles as necessary. Try to give your tails a smooth and consistent transition from wide to narrow.
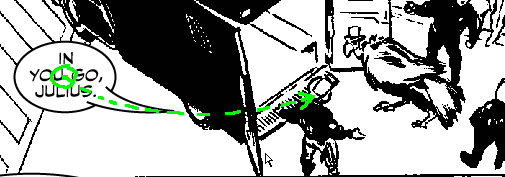
5. The tail should sit on an invisible curve that goes from the center of the balloon to the character’s mouth or head. Tails should always point directly at the source of the sound — you can spot lazy lettering when you see a tail pointing to a character’s shoulder or any other part of their body (unless they actually have a talking elbow or something :).
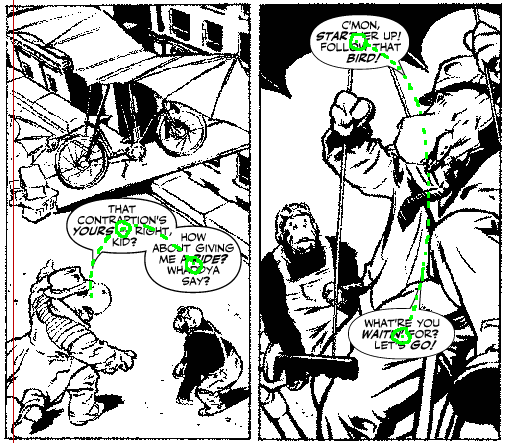
6. If there’s more than one balloon in the panel, try to have the tails follow a single arc through the center of the balloons to the character’s mouth. Aside from looking elegant, this provides a subtle visual clue that allows the reader to immediately tell who is speaking, without having to consciously look to where each tail is pointing.
Joining Two Balloons:
It is usually simplest to overlap two balloons to connect them rather than draw a separate piece. However, these types of joins are occasionally necessary to connect two balloons that go around an object or character, or to deliberately suggest a pause between two pieces of dialogue. Additionally, some artists prefer joins stylistically. Bottom line — be consistent. Make a choice between joins and overlaps, and use that method predominantly throughout a story.
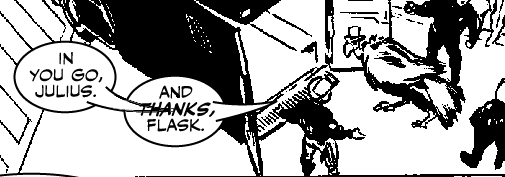
1. The join is really just a tail that overlaps both balloons. Like a tail, it should get wider as it is further away from the character.
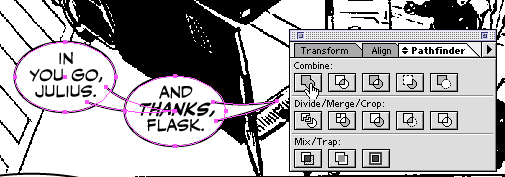
2. Select all the items and click “Unite” in the Pathfinder palette. (In Illustrator 10 and above, Unite is now “Merge”)
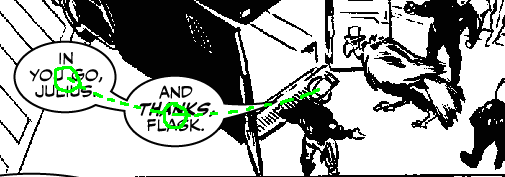
3. The join should sit on the invisible curve that passes through the center of both balloons to the character’s mouth.
Common Mistakes:
1. The first problem in this panel is balloon placement. The second balloon is covering up the character’s head, which is unnecessary when there’s plenty of empty space over on the right.
It’s also important to keep balloons out of the line of sight between two characters whenever possible. The reader is looking for interaction between the characters, and you don’t want them to perceive the balloon as an object in the way.
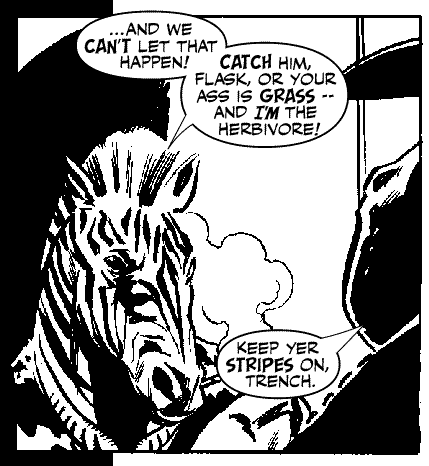
2. Now the balloon is off his head, but it’s covering the tip of Hip’s hat.
Also, since there are two characters speaking in this panel, the pointer on Trench’s balloons should go on the leftmost balloon, so the reader instinctively knows who is speaking as soon as they begin reading.
The third balloon is out of their line of sight, but now it’s covering Trench’s cigarette, and the tail looks like poking Hip in the mouth (another gaffe that can make a balloon be perceived as an object).
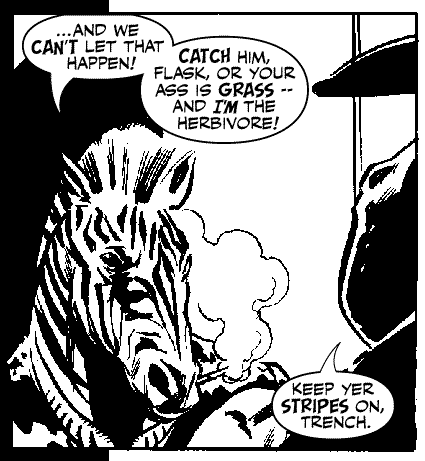
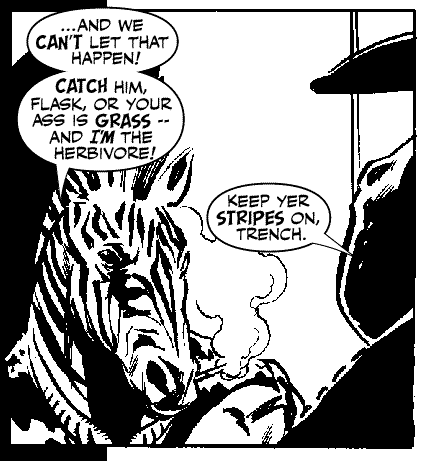
The finished panel! The balloons are off of characters and important objects (as much as possible), and the tails come from the center of the balloons to the characters mouths.
